Published May 28, 2015 12:18PM
3 Ways to Lace Up Your Running Shoes
Here are three lacing methods to keep you running in your sweet spot.
(Photo: Scott Draper)
*Courtesy of Competitor.com
Shoelaces come untied, loosen, bind and can be a knot in your stride. Too loose makes for sloppy striding, too tight and shoes bind and pinch. Here are three lacing methods to keep you running in your sweet spot. (Our step-by-step directions come from Ian’s Shoelace Site.)
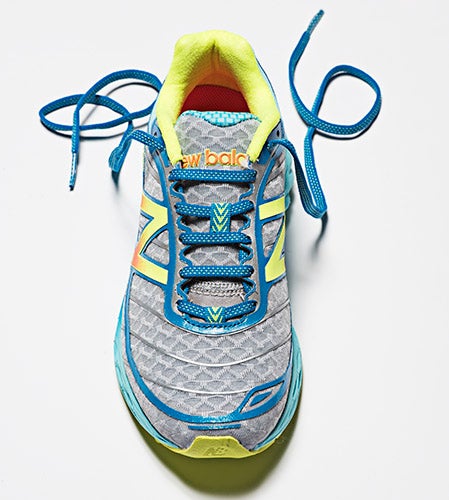
Lydiard Lacing
(also known as “straight bar lacing” or “parallel lacing”)
Try this: if the top of your shoes feel tight or bind.
• Begin straight across on the outside and go in through the bottom eyelet.
• The left lace end runs straight up on the inside, and then goes straight across on the outside.
• Both lace ends run straight up the inside, each skipping an eyelet.
• Both lace ends continue straight across on the outside and in through the adjacent eyelets.
• Alternate until lacing is completed.
Gap Lacing
(also known as a variation of crisscross lacing)
Try this: to accommodate high arches and wider feet.
• Begin straight across on the inside and out through the bottom eyelets.
ADVERTISEMENT
• Use crisscross lacing until just below the area that needs more room.
• Run lace ends straight up the sides to the next higher set of eyelets, creating the gap.
• Continue with crisscross lacing above the sensitive zone.
Loop Lacing Lock
(also known as “runner’s tie” when used as a high lock)
Try this: to minimize heel slippage.
• Lace to the second eyelet from the top using your preferred method.
• Run lace ends straight up on the outside and in through top eyelet.
• Cross lace ends, and then pass them under the opposing vertical section.
• Tying the laces pulls the vertical sections inward for increased foot security.